Reduce React Native Android APK Size: Complete Optimization Guide
ProGuard, Bundle Splitting & Build Optimizations for Smaller Apps
So you made a cool and awesome looking React Native app, and now you’re ready to build it and maybe publish it to the store —
But worried about it if the users would want to install it given its build size? Or maybe you just want to keep it lightweight and not take too much memory unnecessarily when it can be packed into a smaller size?
Or you’re just one of us who are paranoid about build sizes? Don’t worry, we got you covered! 😄 ✔️
bonusAlso check out my other React Native guides:
What We’ll Cover
In this article, we will cover the following two things:
- Compress the react native application size - by compressing the java bytecode that is generated while building our app and also asking it to try and shrink all the resources that are bundled with the application.
- Splitting our application bundle into multiple APKs to remove unnecessary code which is not required by the device which is going to run it - because a lot of code is bundled with the universal APK that is device-specific - meaning that we don’t need a lot of code in the device we’re going to install it in.
Getting Started: Prerequisites
Let’s get started! ✊
First of all, you’ll need to eject your native app if you’re using create-react-native-app for your project ( You might have already done this if you’ve built your application before reading this article ). This is important since you don’t have access to configurations until you eject, as the build folder is where we have to make changes. If you haven’t, you can simply do this by :
npm run ejectimportantEjecting a react native application is a permanent action! ( Unless you’re using a version control system to keep track of previous versions of your app — from where you can recover the ‘unejected’ version of your app later if you need ). Learn more about ejecting.
Okay, so now we’re all set! Let’s get started and get that done fast. Don’t worry, it just takes a few minutes, and your app size will shrink dramatically!
Step 1: Modify build.gradle for Optimization
Now, navigate to the android/app folder from your project root directory where you can find your build.gradle file.
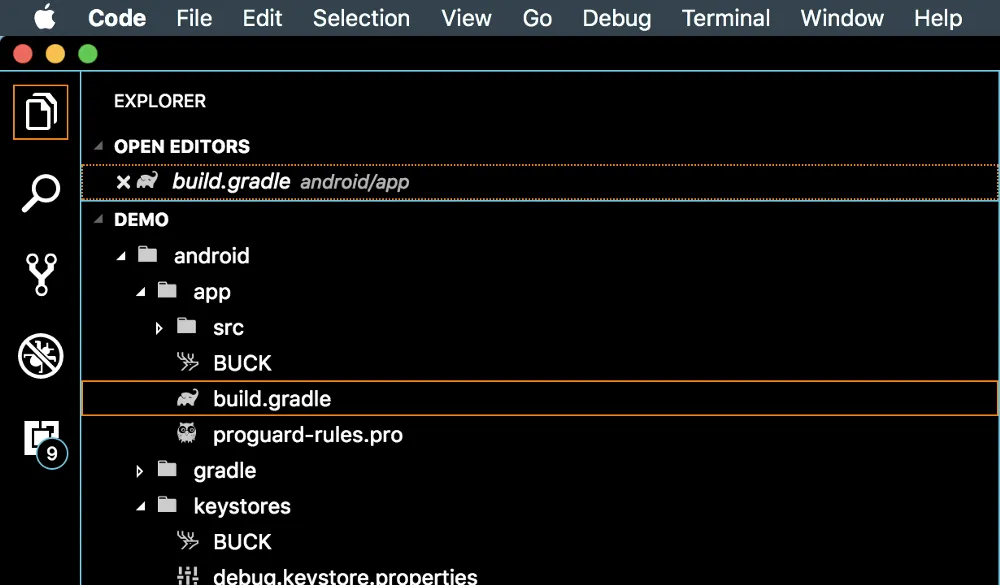
Here, you’ll find your default build configurations already set up, find the line which looks like this :
def enableProguardInReleaseBuilds = false
def enableSeparateBuildPerCPUArchitecture = false
and change their value to true like this :
def enableProguardInReleaseBuilds = true
def enableSeparateBuildPerCPUArchitecture = true
Understanding the Changes
So you might be wondering what it does. Well, if you scroll down a bit you’ll see enableProguardInReleaseBuilds and enableSeparateBuildPerCPUArchitecture written at a few more places like here:
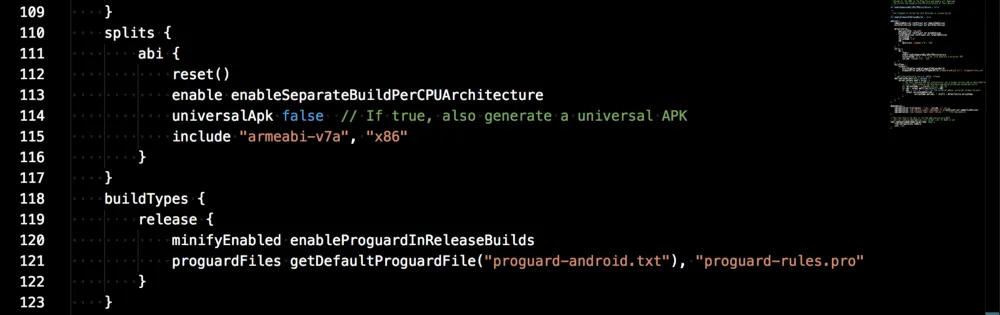
As you can see, these variables are being used to enable or disable two build configurations —
- One for generating separate .apks for different device architectures (
enableSeparateBuildPerCPUArchitecture):
...
splits {
 abi {
 reset()
 enable enableSeparateBuildPerCPUArchitecture
...noteDon’t worry about having to handle different .apks for each architecture — Google takes care of distributing it to the users! And separating the builds according to architecture removes unnecessary code from your file which is not required on the device it is running.
- Another one for compressing the Java bytecode generated while building (
enableProguardInReleaseBuilds), as in:
...
buildTypes {
 release {
 minifyEnabled enableProguardInReleaseBuilds
...
Phew, that was pretty easy! But wait, we’re not done yet! There’s one little thing we need to do.
Step 2: Enable Resource Shrinking
Now let’s add this line right below the minifyEnabled configuration :
...
buildTypes {
 release {
 minifyEnabled enableProguardInReleaseBuilds
 shrinkResources true; /* <-- Add this line */
...
Step 3: Build and Verify
And we’re done! Now build your app again and check the output directory inside android/app/build/outputs/apk/release. You’ll find two different APKs of your app, which is specified in the configuration by default, i.e., for armebi-v7a and x86 architectures (or similar, depending on your React Native version).
Oh, and by the way, if you need a universal APK that supports all device architectures — just set universalApk to true within the splits { abi { ... } } block, and it’ll generate a universal APK next time you run build!
Conclusion
That’s all! By enabling ProGuard (minifyEnabled), resource shrinking (shrinkResources), and architecture-specific builds (enableSeparateBuildPerCPUArchitecture) in your android/app/build.gradle file, you can significantly reduce the final size of your React Native Android application. This leads to faster downloads and a better user experience.
Thanks for reading! You can check out more resources on how to reduce the application build size.
Did you like this article? Or did I miss something? Is there something that you have that can be added to this article — that can make it even better?
Please leave a comment below, or you can also contact me through my contact page.
Thank you for reading! 😄
Happy Hacking! Cheers!